
It officially became spring a few weeks ago and I was itching to be creative. We've had a set of white, cotton napkins for years. They were a wedding gift and we have loved them and used them well.
They're not quite so white anymore and there are some lingering mustard and red wine stains. At least I'm guessing mustard and red wine...after 4.5 years of trusty service they could be stains of anything really. We like to eat, a lot...
I decided it was time for some new napkins and that I was going to make them.

I got really excited as I planned a lunch-time trip to the Michel Levine's fabric store in downtown Los Angeles. I was even more excited about having my super creative colleague with me. I knew she'd be great at helping me make up my mind (Am I the only one who wants to #buyallthefabric ?) and keep us on schedule. No hours of ruminating in the isles for me, not on this day.
I couldn't wait to get home with my loot from the fabric store and get to work.

For this project I got a little over a yard of pink chevron cotton (I took whatever was remaining on the bolt) and a yard and a half of another cotton with a bright pink, orange, and green pattern. The rest of this I hope to transform into dresses...stay tuned.

First step: Ironing, Lots of ironing. My fabric was pretty wrinkly when I brought it home so I wanted to straighten everything out before I got to work.

Next, measure and cut your fabric into squares.

My fabric was 45 inches wide. I used my existing white cotton napkins as a guide. They're 20 inches square.
I cut the pink chevron into 4 21 inch squares. I reduced the size for the other pattern to 19 inch squares so I could get a set of 6.

The seams on these napkins are folded twice, to offer a nice, substantial edge.
With the right side of my fabric on the ironing board (wrong side facing up) I folded inward half an inch. Ironing as I went, I used my pointer finder as a guide to keep the width consistent.

I folded the two sides that were parallel to each other first before rotating and folding the other two.
I made sure to tuck and iron the corners so they would be nice and neat when it came time to sew.
I didn't miter my corners, but you could if you wanted to.
I didn't miter my corners, but you could if you wanted to.

I repeated the process, using the first fold as a guide, folding over and ironing again.

Folding and ironing finished! Time to sew!

I used a straight stitch and sewed close to the edge of the fold. That way, there wouldn't be a lot of seam to stick up or get caught on anything.

I back-stitched at each of the corners leaving the needle down and pivoting the fabric to change directions. This gave me one continuous seam around the napkin and hopefully fewer possible places for the stitching to come undone with lots of use.
(I used a pink bobbin and white top thread because that is what i already had ready to go in my machine. I'm hoping that because of the colorful pattern of my fabric no one will really be able to tell.)
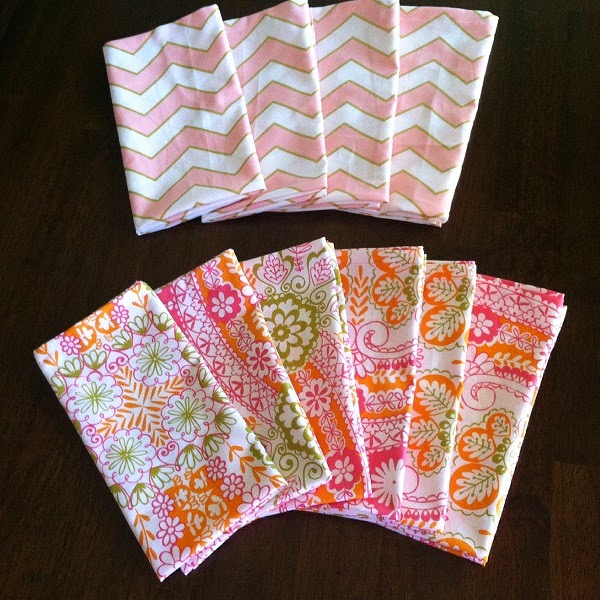
Finished product! This was seriously super easy. Total project time was about 3.5 hours - including stopping to take photos.
Most of that was spent ironing. This project is more cutting and ironing than it is sewing, really.
I'm pretty excited to brighten up my table and start using these!


0 comments:
Post a Comment